
Quests of the Known World
Walkthroughs, rewards, and hidden outcomes for every major quest in A World of Ice and Fire.
- Main Questline
- Lord Varys’ Questline
- Beric Dondarrion’s Questline
- The Purge
- We Take What Is Ours
- Quests Through Rumours
- Joining the Free Folk
- Battle for Brightroar
- A Blood Sacrifice for the Black Goat of Qohor
- Giant Lair Beyond the Wall
- Wolf Den
- Cave Beyond the Wall
- Ice River Cannibal Camp
- Old Valyria (Ruined Castle)
- Bringing a Warlord to Justice
- Freeing a Brother
- War for Dawn
- Bandit King
- A Ballad of Sea and Serpents
- Battle of the Bastards
- Red Wedding
Main Questline
AWoIaF Mod contains a main Quest line which will be initialized upon starting a new game. You can choose to follow this quest or not, though it’s advised to do so to gain some good experience and a few extra Stags. Note that if Robb Stark dies in the Red Wedding, the quests involving him can no longer be completed. The main questline currently consists of:
The Pointy End
You are tasked to meet with Lord Robb Stark and warn him about the situation that happened back in King’s Landing. Accepting this task gets you 2 Stark soldiers and -10 relation points with The Westerlands.
- Reward: 2 Stark soldiers, +2 renown, +5 relation with Robb Stark
Winter is Coming
- Objective: Go to a farmstead north of Winterfell and kill the wildling raiders.
- Reward: 10 honor, 10 renown, 200 silver stags, plus an extra 600 stags, 2 renown, and +6 relation with Robb Stark.
Winter is Coming – Part 2
- Objective: Deliver a message to Lord Commander Jeor Mormont at Castle Black.
- Reward: 4 renown, +1 relation with Robb Stark.
Bridges and Bones
- Objective: Help the Night’s Watch at the Bridge of Skulls defeat the wildling host.
- Reward: 5 renown, +1 relation with Jeor Mormont.
Bolster the Black
- Objective: Return to Robb Stark and argue for more men for the Watch, then go back to Jeor Mormont with the answer.
- Reward: 4 renown, +1 relation with Jeor Mormont.
- Note: Do not report back to Jeor Mormont until you are ready to start the next quest.
The Lands of Always Winter
- Objective: Gather a small force (and a Valyrian weapon, if possible) and scout the far north.
- Reward: None directly; sets up the next quest.
- Note: The quest will automatically start when you complete the previous quest. Jon Snow will join your party when you start this quest. He will complain if you go too far south, and will leave your party the third time he complains. If he leaves, the next quest never starts as he never sends the letter. Make sure you have no reason to go south again until you have finished the quest. For example, if you want to use a Valyrian steel weapon during the quest, you must get it before you start the quest.
It is recommended that you have no need to go south of the Wall again before the quest is completed, so prepare accordingly. Get the troops and weapons you want to use before you start the quest. It is recommended to bring at least 20 expendable troops, or a Valyrian steel weapon and obsidian arrows for this quest, depending on whether you want to flee or fight the White Walker party. Obviously, if you want to defeat the White Walker party, you should bring troops capable of killing wights, such as those with obsidian or fire weapons.
Jon Snow joins your party when starting this quest. He is a powerful companion, but stays in your party only for this quest. He will make complaints and ultimately leave your party if you remain too far in areas south of the Wall, or spend too much time resting in a location, and if he leaves, the next quest never starts.
Your task is to go north of the Wall and scout around until you encounter a party of White Walkers. They can usually be found somewhere in the overall area west of Thenn, but they can be anywhere in the lands beyond the Wall. Their strength will depend on whether they have defeated and absorbed other parties before meeting you, and usually ranges from 50 to 500 troops. To complete the quest, you need to encounter the party in battle, although you don’t need to actually start the battle.
Once you have found the party, you have three main options: Try to win the fight, try to leave the fight, or surrender.
The easy and optimal way is to flee by doing the following: Bring with you a group of low-level troops that you don’t mind losing. The number of troops needed depends on how strong the White Walker party is. Once you have found the White Walker party, leave all the better troops you don’t want to lose in Troop Quarters (accessible through Reports -> Troop Quarters). Make sure the Troop Quarters is not close to where you meet with the White Walkers, to avoid them joining the battle. When ready, meet with the White Walker party. When the battle starts, choose “Pull back, leaving some soldiers behind” and leave the fight. Ideally, this will allow you to leave the fight while sacrificing only cheap troops. Jon Snow has high tactics skill, which further helps reduce the casualties.
The more difficult but honourable method is to try to win the battle. This is possible if you have a Valyrian steel weapon and obsidian arrows, and are able to defeat them yourself, or if the White Walker party is small enough, and you have brought troops that can defeat wights, such as giants, Fireborn, or troops with obsidian weapons. If you don’t have a Valyrian steel weapon, you might be able to pick up Longclaw from Jon Snow on the battlefield if he has fallen unconscious. One strategy is to bring three bags of obsidian arrows, use them to kill as many wights as you can, and then try to finish the rest with Longclaw dropped by Jon Snow.
The third option is to simply lose or surrender the fight. This has the normal consequences of a lost fight, and is obviously not recommended, as you might lose valuable items, troops, or companions. Event companions like Dongo and Wun-Wun will never return or become recruitable again if they leave your party due to a loss.
(Note: As of version 11.5, another White Walker party may spawn if you have defeated the first one. Complete the quest before you attempt to kill the second party. This prevents more parties from spawning before the main invasion in War for Dawn.)
Once you have encountered the White Walkers and won, left or lost the fight against them, the quest is ready to be finished. Head south and report back to Jeor Mormont to finish the quest. There is no reward, this simply sets up the trigger for the next quest.
Mutiny at Craster’s Keep
- Trigger: Three weeks after “The Lands of Always Winter”, Jon Snow sends a letter.
- Objective: Go to Craster’s Keep and kill the mutineers.
- Reward: +1 relation with Jon Snow, +1 renown, and a piece of Valyrian Steel.
Walkthrough (Spoilers)
This quest is straightforward: Go to Craster’s Keep, found in the forest near the Wall, and kill the enemies there. The enemy will be a handful of Night’s Watch troops, but don’t underestimate them. To make this easier, bring a few good fighting troops or companions and make sure they are at the top in your party list, so they join you in the fight against the mutineers.
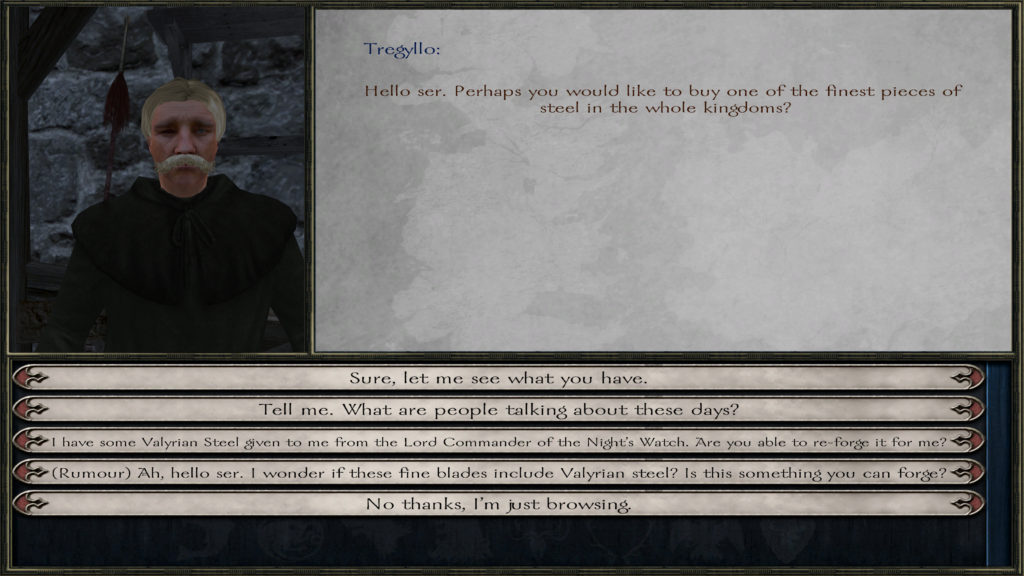
The Valyrian steel you get as a reward can be forged into a Valyrian longsword in Qohor. Go to Qohor, choose “stroll through town” or go to inn and from there out to town. The weaponsmith Tregyllo is found by turning right when existing tavern and then walking straight until you encounter his stall. Talk to him with the piece of Valyrian steel in your inventory. Choose the dialogue option mentioning the Night’s Watch. At a cost of 50 000 stags, Tregyllo will agree to forge the piece of Valyrian steel into a sword. Return a week later and talk to him to pick up the sword. The sword is one of the best weapons in the mod.
(Note: There is a fake piece of “Valyrian steel” sold by an NPC in a tavern. It cannot be used to forge a sword.)
Lord Varys’ Questline
Speak to Lord Varys in the Great Keep at King’s Landing. He’s standing on the left side of the entrance.
1. The Messenger
- Objective: Meet Varys’ agent in Sunspear, get the coded message, and return to Varys.
- Reward: 300 silver stags, +5 relation with Varys.
2. The Spy Hunter
- Objective: Follow a spy leaving King’s Landing. Capture the spy; capturing his contact as well yields a better reward.
- Reward: 1,500 stags (spy or contact alone) / 2,000 stags + the book A History of the Great Sieges of Westeros (both), +5 relation with Varys.
3. Knightslayer
- Objective: Destroy a Hedge Knight camp near Duskendale (18–41 Hedge Knights, 31–56 sellswords).
- Reward: 1,500 silver stags, Targaryen Plate Armour (52 body / 41 leg), +5 relation with Varys.
4. Bravos Seeker
- Objective: Train (or recruit) 12 Skilled Bravos troops and bring them to Varys.
- Reward: 3,300 silver stags, +5 relation with Varys.
5. The Message
- Objective: Meet Varys at the Sept of Baelor. The outcome depends on your dialogue choices.
Walkthrough (Spoilers) (Click to expand)
After you speak with Varys, he will ask you to meet in the town outside the Sept. Talk to him.
In the dialogue choices with him, if you choose options opposed to Targaryens, Varys will pay you 4000 stags and the quest will end with no further consequences.
If choose to show sympathy for Targaryens, Varys will send you to meet with Doran Martell, who you can find by walking around in Salt Breeze, a village near Sunspear. (Note: Doran Martell in this quest is handled separately from the Doran Martell as a kingdom lord.) Talk to him and again support Targaryens. Return to Varys to tell them the news. The quest will end, and soon after, a new kingdom will be founded, headed by either Aegon or Daenerys Targaryen, depending on whether you chose the book or tv series naming convention. They and Dorne will immediately declare war on whoever owns King’s Landing.
Beric Dondarrion’s Questline
Find Beric at Hollow Hill.
A Lannister Always Pays His Debts
- Objective: Defeat the Lannister raiding party near Hollow Hill.
- Enemies: 14–20 Lannister foot soldiers, 10–12 Arbalesters, 14–20 scouts.
- Reward: The book Westeros the Old.
The Purge
- Trigger: Kill all Lannister troops during the opening sequence.
- Reward: Dagger Silence, 1,000 experience, 50 renown.
We Take What Is Ours
- Trigger: Speak to Rory in the tavern at The Arbor.
- Objective: Help get rid of the Ironborn captain Dagmer Cleftjaw. You can intimidate him (requires high Strength) or fight him and his warband outside the gates.
- Reward: 1,500 silver stags, 400 experience. Additional gold and XP if you fight.
Quests Through Rumours
You Win or You Die
There is a random chance of activating and completing this quest when attacking herds of boars, and a huge boar will spawn. If you kill the huge boar, you will be informed that this is the boar that killed King Robert Baratheon. After you complete the quest, you can go back to King’s Lands, and there is an option to turn in the boar, which results in the player receiving stags and a boost in reputation. The huge boar that killed Robert Baratheon can roam as far north as Dukensdale, as far south as Storms End, and as far west as Hard’s own. Some players have specifically said they have encountered the huge boar around the Stormslanding area.
- Reward: Silver stags and a reputation boost.
Joining the Free Folk
Join the King beyond the Wall
- Objective: Complete this quest to become part of the Free Folk and join Mance Rayder.
Battle for Brightroar
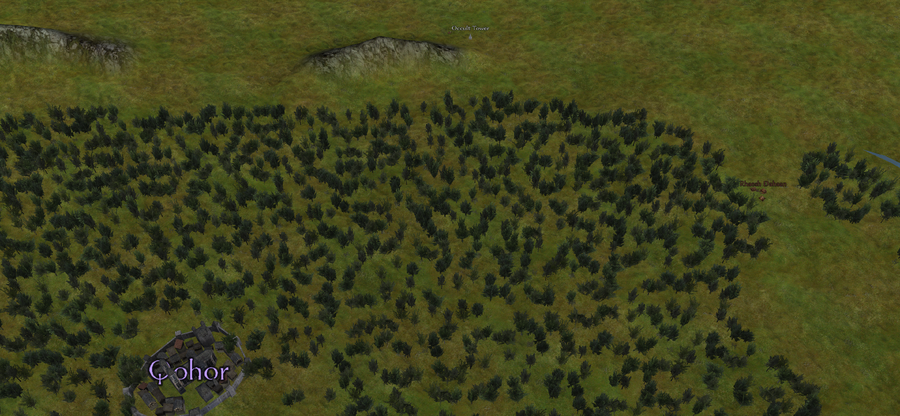
- Location: Occult tower northeast of Qohor.
- Objective: Explore the tower and defeat the occultists led by Magus Crowley.
- Reward: Valyrian steel sword Brightroar, 200 renown, positive relation boost with R’hllor.
A Blood Sacrifice for the Black Goat of Qohor
- Trigger: Speak to Draquen Ormatis in the Qohor tavern.
- Objective: Raze the Temple of the Bearded Priests and defeat the retaliating army (800+ troops) led by Calypso Eranelar.
- Reward:
- Execute Calypso → Valyrian steel glaive Retribution.
- Silver stags for razing the temple.
- Turn in quest → Black Goat High Acolyte helmet.
- Negative impact on the commoners’ trust.
Giant Lair Beyond the Wall
- Location: Giant lair beyond the Wall.
- Objective: Defeat all giants.
- Reward:
- If you are Free Folk → companions Wun‑Wun and Dongo join.
- Otherwise → a trophy exchangeable for 3,000 silver stags.
Walkthrough
The giants can easily be defeated using horse archery. Show up with a decent horse, a decent bow, and at least two bags of arrows. Always aim for the heads of the giants, as they receive very little damage if hit in their body. Dongo is the only giant with a ranged weapon, so taking him out as soon as possible should be your priority. The other giants cannot hurt you if you ride away and always keep your distance. If you run out of arrows, it is possible to slowly melee them to death by swinging at them with a good weapon or with the help of speed bonus damage, but this is much riskier than using ranged weapons.
Wolf Den
- Location: Forests near Deepwood Motte.
- Objective: Enter the den and kill the dire wolves.
- Reward:
- If you are Northman → Direwolf companion.
- Otherwise → trophy for silver.
Cave Beyond the Wall
- Location: Cave beyond the Wall.
- Loot: Obsidian arrows and an obsidian dagger (effective against wights).
Ice River Cannibal Camp
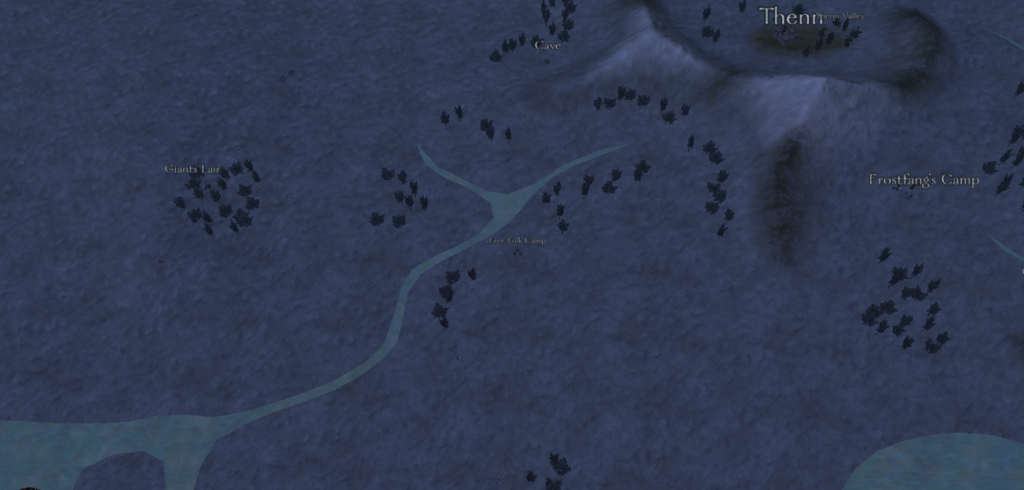
- Location: Shore north of Bear Island.
- Objective: Defeat the cannibals led by Gragg Bloodrager.
- Reward: Unique bastard sword Blood Bringer, human flesh, and a lootable chest.
Old Valyria (Ruined Castle)
- Trigger: Speak to Ser Janis Lyren at the Crossroads Inn (between Saltpans and Lord Harroway’s Town).
- Objective: Find his ruined castle east of Volantis and rebuild it.
- Requirements: 10,000 silver stags, 50 troops (any kind), 1 set of tools.
- Notes: This is how you can start your own kingdom without conquering a fief from another faction. Ser Janis is not a hero companion and can die, but the quest can be completed even if he dies.
- Tips: Ser Janis Lyren is a strong unit obtainable for free just by starting the quest, and is not needed alive to complete the quest, which can make him useful in the early game long before you’re ready to complete the quest. The quest includes a small fight, so it is best to include at least a few higher-tier units in your party.
Full Walkthrough (Spoilers)
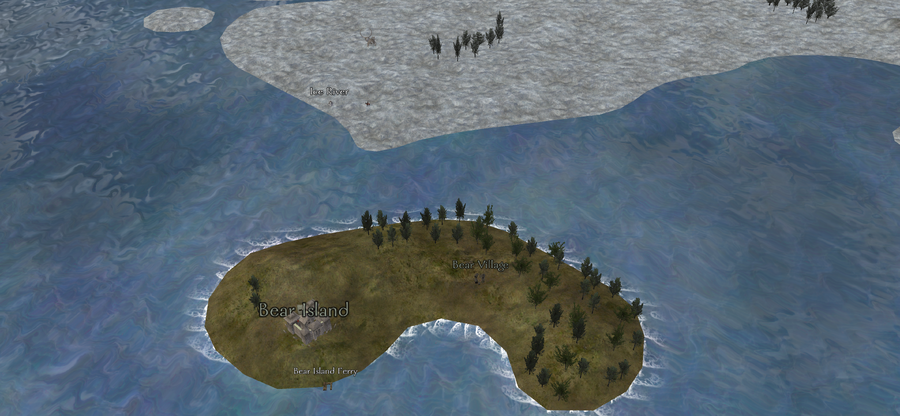
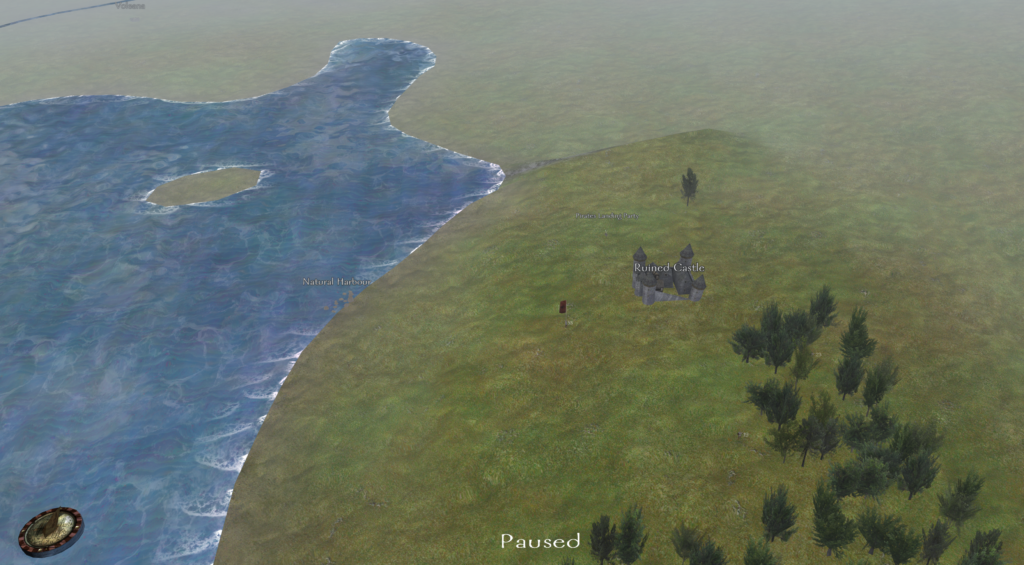
Enter the Crossroads Inn, which can be found near the bridge next to Saltpans. Speak to Ser Janis Lyren, found standing near a round table. Hear his story and tell him it sounds interesting. When you answer “OK, let’s go”, he will join your party after you leave. Buy tools, which can be found for sale occasionally in most towns. Gather any troops until your party has at least 50 troops in total, but note that you will fight a slaver party of 40 troops later, so your party needs to be strong enough to defeat them. Go to the far southeast part of the map, near a Natural Harbour, where you will find a Ruined Castle, as shown in the image below. Enter the Ruined Castle, and choose the option to “Claim this place for yourself”. If you didn’t already own a faction or join another faction, your own kingdom will be founded. At this point, the quest is already complete. However, time will pass, and you will be attacked by a slaver party with about 40 slavers, including camel riders and spearmen. The quest will be completed even if you lose. Your reward for completing the quest is your very own castle, Qarthiqar, and a village, Taelon.
Bringing a Warlord to Justice
- Trigger: Random map event after reaching 1,000 renown.
- Objective: Defeat the warlord Brog Matter and his army (end‑game challenge).
- Reward:
- Execute him → unique armor + Valyrian steel sword Dark Vengeance.
- Spare him → he joins as a companion, and later unlocks the “Freeing a Brother” quest.
Freeing a Brother
- Trigger: Some time after sparing Brog Matter.
- Objective: Help Brog free his brother from a slaver’s camp (large battle).
- Reward: Companion Reed Matter with unique armor and the Valyrian steel sword Reaper’s Vengeance.
War for Dawn
- Trigger: At the start of the White Walker invasion.
- Objective: Defeat all White Walker armies.
- Bonus: If you follow R’hllor, the messenger and his warband join you.
- Reward: After all armies are destroyed, speak to Benerro at the Temple of Light near Volantis → Flaming Valyrian steel great sword R’hllor’s Glory.
Full Walkthrough (Spoilers)
This is a very difficult and time-consuming task. You will probably need to spend hundreds of thousands and even over a million silver stags, and obtain thousands or at least several hundred, troops. Although not strictly necessary, you will also want access to the obsidian deposits on Dragonstone, either by owning Dragonstone or being friendly with its owner.
White Walkers and their wights can be killed only by special weapons and troops wielding them. These include: Any Valyrian steel weapon, any obsidian weapons including obsidian arrows and fire arrows, and any weapon blessed with fire, such as Thoros of Myr’s sword. Additionally, giants can kill them with their clubs and stone axes. Some unique weapons like Dawn, Bloodbringer, and Lightbringer are not made from Valyrian steel or obsidian, or blessed by fire, and therefore cannot be used to kill wights. (The dagger Silence can kill wights but not White Walkers.)
As a result, troops that can kill wights and White Walkers include at least the following: Any giants, including Dongo and Wun-Wun. Any troops hired from the Obsidian mine, such as axemen and spearmen. Any troops with fire arrows, such as Night’s Watch Rangers. Elite R’hllor troops with weapons blessed with fire, such as the Fiery Scimitars of Fireborn and Fireborn Guard. Some other troops, like the Old Gods Shield Guard and its upgrades, which have obsidian weapons. Some troops such as Thenn Chosen Axemen have obsidian daggers, but these are very ineffective.
The main obsidian troops can be hired only from the Obsidian mine (Obsidian Deposits) found on the island where Dragonstone is. The deposits need to be developed into a mine first. As of version 11.5, you don’t need to own Dragonstone, but it can make doing this easier. Talk to the Village Elder of Aenar’s Rest to gain permission to build the mine. You need to pay 70 000 stags to get the permission. Additionally, you need to have 12 stone, 12 timber, and 7 tools in your inventory to start building the mine. Household inventory accessible from your Master of Coin or other officials can be helpful with storing these items while you gather them. Points in the inventory management skill help you have enough space in your inventory. Once the mine is completed, you can walk around the mine and speak to Duncas to hire different obsidian troops, at a cost of 35,000 stags per 50 axemen or spearmen. Mounted troops are slightly more expensive, archers slightly cheaper. The mine produces a limited number of obsidian per day, and troops can be hired only if there is enough obsidian in the stockpile. The mine can be upgraded to increase the obsidian production rate.
You will likely need at least a thousand obsidian troops to defeat even one of the White Walker parties, which typically have over 4000 troops. Bridges could be a useful location for the fight, as controlling the bridge can funnel the wights into a chokepoint and allow archers to shoot at them safely while melee troops stop them from leaving the bridge. However, because the wights are very fast, reaching the bridge in time to control it can be difficult. Bridges also limit player mobility.
In theory, in addition to the obsidian mine troops or even instead of them, you could amass troops such as Fireborn or Old Gods troops, but troops other than the obsidian mine troops are generally much more difficult and time-consuming to amass in sufficient numbers.
The player can contribute to the fight by riding around, distracting the wights and shooting at them with obsidian arrows, and by hitting them with a suitable weapon, but be careful not to be injured, as battles using autoresolve will heavily favour the wights.
Unlike in the Game of Thrones show, killing the White Walkers or the Night King does not affect the wights; they act simply as slightly stronger troops mixed in with the wights. Alongside Wight giants, they should therefore be a priority for the player to kill personally if possible.
If the player has Free Folk heritage and over 600 renown, giants can be hired from Mortik, who is found in the lord’s hall of Frostfang’s Camp. Giants are very powerful, and a large enough group (e.g., 20 or more) can potentially take on hundreds of wights with no losses, especially if shielded with a mix of other troops like axemen.
As of version 11.5, the following strategy is known to be successful with battle size set to 300: Gather at least 20 giants and 500+ obsidian troops (you probably need less if you have a lower battle size or can kill many wights yourself). Having high tactics skill on yourself or a companion also helps. Assign the giants and obsidian troops into the same battle group (e.g., infantry). At the start of each battle with White Walkers, order them into a shield wall (Using commands F4, F5 during battle). Ordering them to stand closer might also help (F2, F4). The obsidian troops will form a frontline that protects the giants, while the giants do damage from behind them. Some obsidian troops will be killed or wounded, but the giants should survive. If you have the natural leader trait, press U periodically to “rally your troops,” which will partially heal your giants.
Some amount of normal troops can be brought as padding for better battle advantage, even though they cannot damage the wights. Order your troops in your party list from top to bottom in the order of priority for them to show up in the battle, e.g. Giants at the top, obsidian troops after them, normal troops and your healer and tactics companions at the bottom.
The White Walker parties can initially be found north of the Wall and near Castle black, but will eventually migrate south. Parties can end up, for example, in the Vale or as far south as the Reach. A White Walker party is known to sometimes get stuck near the village of Fingers in the Vale.
Some time after the Night King’s party and all the White Walker parties are defeated, you will meet again with a messenger of R’hllor. He will tell you that the White Walkers have been defeated, and will tell you to visit the Temple of Light, which is found near Volantis. Enter the temple and talk to Benerro to receive your reward, which is a two-handed flaming Valyrian steel sword.
Bandit King
- Trigger: Day 170, message from Stannis Baratheon.
- Objective: Defeat the Bandit King’s army (1,400+ bandits) roaming the Riverlands.
- Reward for killing him: Goldenheart Bow, Round Shield, Steel Helm, Mail Brigandine, Scale Mittens, Mail Chausses, large bag of barbed arrows.
- Turn in to Stannis: 5,000 silver stags, Weirwood Bow, 125 renown, +25 relation with Stannis, moderate increase in commoner trust.
A Ballad of Sea and Serpents
- Trigger: Day 230, from Triarch Malaquo Maegyr of Volantis.
- Objective: Defeat the pirate Aurane Waters and his fleet.
- Reward for executing Waters: Valyrian steel scimitar Striker.
- Turn in to Maegyr: 20,000 silver stags, +15 relations, 40 renown, 5,000 experience.
Battle of the Bastards
- Trigger: Between day 360 and 400. Requires Robb Stark to be dead (Red Wedding), Winterfell owned by the North, Sansa not married to the player, Ramsay Bolton alive, and Jon Snow alive and Commander of the Night’s Watch.
- Location: Near Winterfell.
- Choice: Support Jon Snow or Ramsay Bolton.
Support Jon Snow and win:
- Jon becomes King in the North, leaves the Watch. House Bolton dissolved. The Vale and North make peace.
- Player gains: +75 renown, 2,000 exp, higher relation with Jon, reputation boost, commoner trust boost, and after 3–4 weeks, a letter to meet Jon for a masterwork Dragonbone bow.
Support Ramsay Bolton and win:
- Jamsay becomes King in the North, Jon dies, the Vale declares war on the North.
- After the battle, you duel Jon Snow:
- Win the duel → Valyrian steel sword Longclaw, 3,000 exp, 150 renown, +30 relation with Ramsay, huge reputation and trust drop.
- Lose the duel → permanent death.
- Decline the duel → a bottle of pussy tears, 1,500 exp, 30 renown, +40 relation with Ramsay, huge reputation and trust drop.
Red Wedding
- Trigger: Day 150 at Winterfell.
- Choice: Take part as a Stark loyalist, a Frey loyalist, or stay out.
Stay out:
- Robb dies, Roose Bolton takes the North, Walder Frey takes the Riverlands, Brynden Tully joins the Vale, Winterfell is redistributed.
Stark loyalist (save Robb):
- Robb lives. +5 relations with Robb, +6 with the North and Riverlands, -10 with the Westerlands. Lord Walder and Roose Bolton switch to the Westerlands with all their fiefs.
Frey loyalist (Robb dies):
- Same outcome as staying out, plus: +5 relations with Roose Bolton and Walder Frey, +6 with the Westerlands, -10 with the North.